

I have never really written a post that gave insight about my photoshop process. I'm a big photoshop lover, all the way. I love photography but one of the things that truly made me fall in love with the possibilities that photography delivers is the fact that I can play with the photos in photoshop. So many images I have done in the past wouldn't have been possible without photoshop, for me at least. I thought it would be neat and a good way to kick off my new blog with a post that explained how I made my latest portrait.
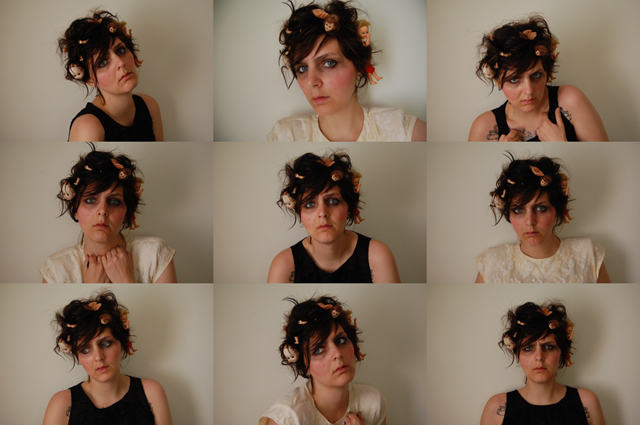
For every portrait I do, I always shoot at least 100 images, if not more. In different outfits, space, positions, etc. If I learned anything from my 365 project, it was to shoot as many images as possible because often I'll get inspired by a specific image I shot and end up taking a completely different route. I really love that type of creative process because I end up exploring something new that I didn't originally have planned in my head. It feels really exciting. Honestly though, most of my portraits come from faint images in my head that is constantly changing as I work through the images after shooting. It's pretty rare when I have a very specific image in my head, usually it's more of a concept but the little details are ever-changing.
I shot about 100 images in natural light. I usually don't really use flash very much unless I feel that it's way too dark and I wouldn't be able to fix the light in photoshop well enough. I tried two outfits as I couldn't really decide which one I wanted. In my head I saw an isolated lady with dolls in her hair. I wanted the feel to be kind of haunting. I also just really wanted to play with my hair because it's finally long enough to do this sort of thing... and I was dying to do something with all the dolls I have collected over time. If you're a friend of mine, you know me and my love of creepy dolls. I used to have them displayed in my rooms, creeping my guests out. Now I live with my lover so I have to "compromise" by only displaying one or two, not all of them. Most of them are now in a box (which I sometime feel guilty about). So it's always a pleasure to take them out of the box and using them for various reasons. In this case, I wrapped them all up in my hair and used a whole hella lot of hairspray and bobby pins to keep it together. After shooting for a little bit, I then looked at all the images on my computer and selected several images that I wanted to study more in photoshop.
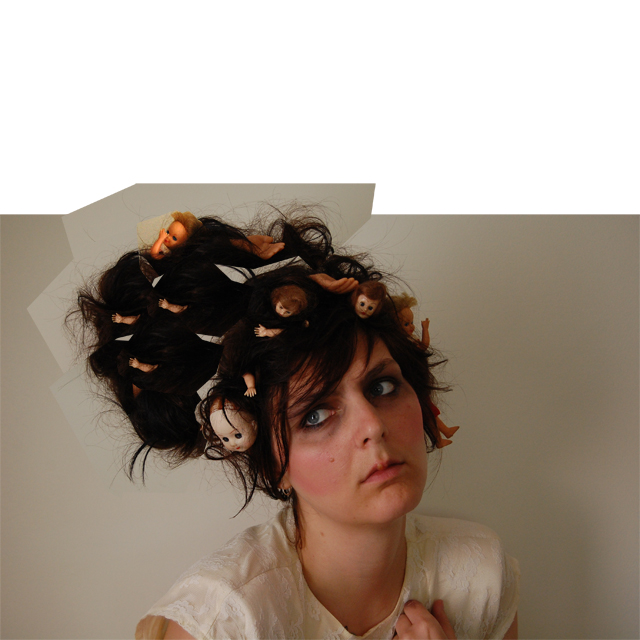
After some studying, I selected a base image to work with, and saved some other images of the dolls in different angles so I could add them to my hair as I made my hair longer.

I began working on adding bits of other images of the dolls into the base image and deciding on what kind of shape I wanted my hair to be. This involves a lot of layering, rotating, re-sizing, etc. I decided I wanted the final image to have a square crop so I added some empty space above to eventually fill in.
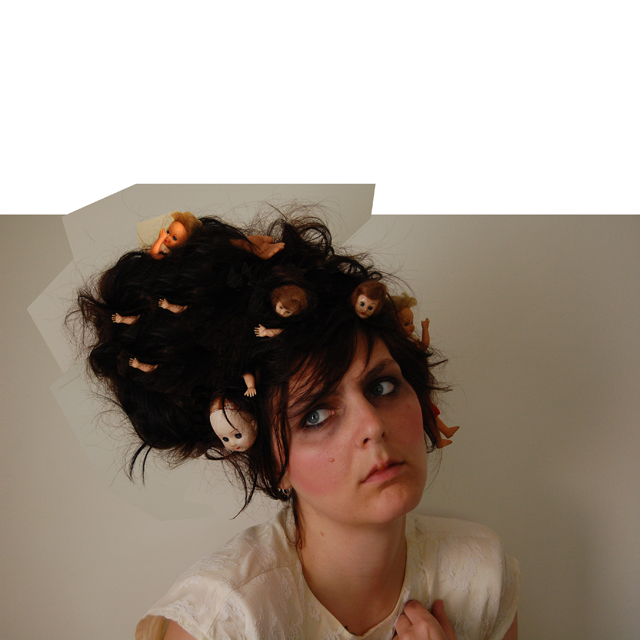
After I felt pretty satisfied with the overall shape of the hair and all the dolls. I then started to fill in the missing pieces by cloning and airbrushing.
I knew from the beginning that I wanted the portrait to seem elegant but also slightly off and creepy. I felt that my neck looked way too short in this image so I decided to make it longer. Which felt a little bit challenging to me as I didn't have very much experience with stretching limbs and having it still look realistic. So this was a fun experiment for me! I also airbrushed away my cold sores on my lip. Only if I could do that in real life...

I obviously needed to work on the neck some more but took a break to smooth out the background/fill the empty space. I then twiddled around with the curves, colours, etc in photoshop before returning to the neck to do some more work. I also added some more doll parts.
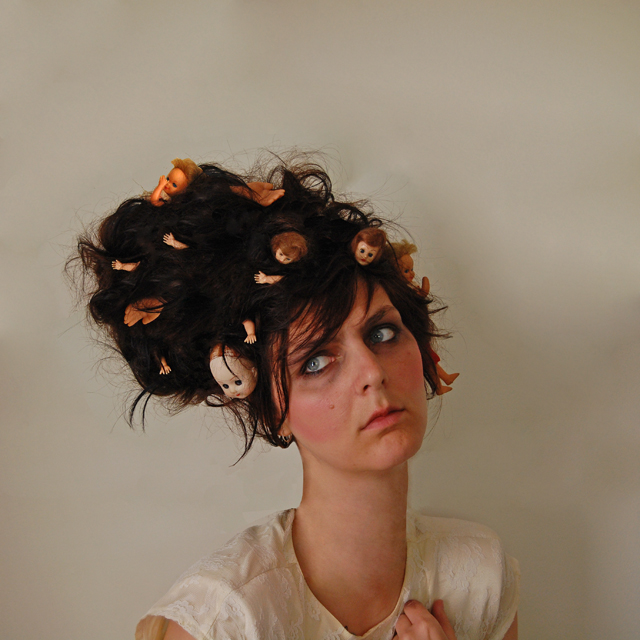
I felt that there were perhaps too much space around the lady so I cropped in a little bit. Looking back now though I'm not completely sure if I made the right decision or not. It's interesting to look back on portraits and question what we were thinking during the process. Some of my 365 portraits, I find myself looking at them and going, I would've done it this way instead or why is this not brighter? Etc. I suppose over time our tastes change and also time constraints really plays into the picture for sure, there were times with the 365 project where I just wanted to finish the portrait so I could get out and do something else. Finally I worked on the colours some more to make it look the way I wanted it to look and did some final minor touches.
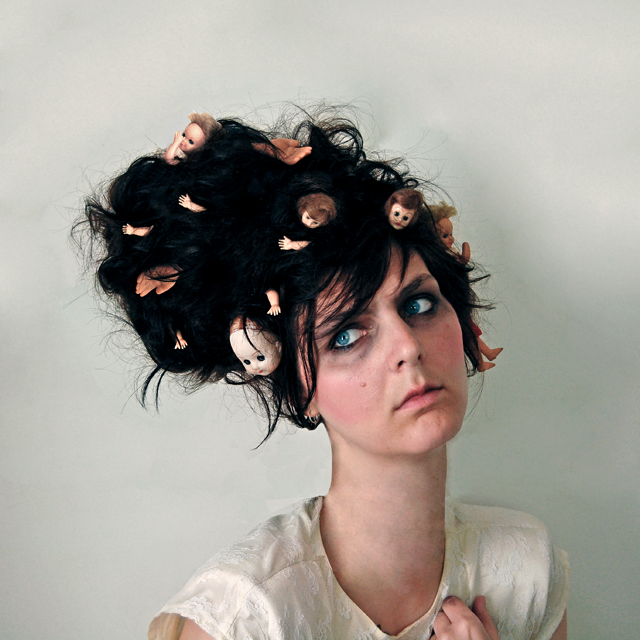
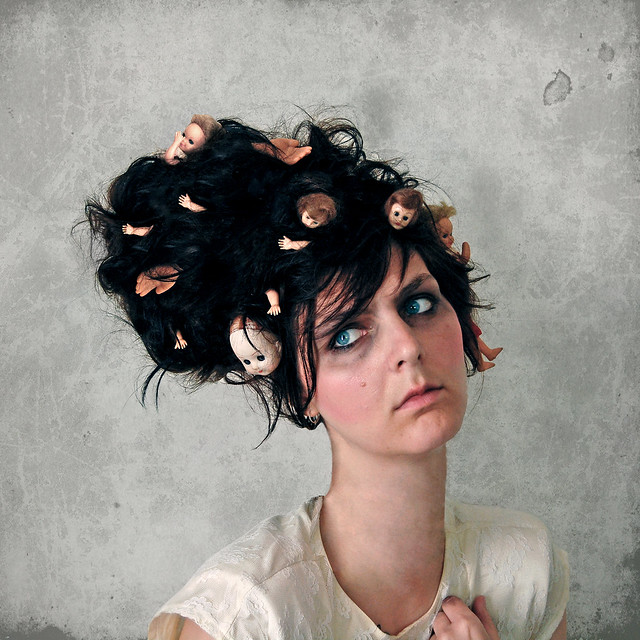
I felt that the background and my dress blended in too much so I replaced the background with something more textured. Tada, completed!
That's some very impressive work. How did you make your hair look longer?
ReplyDeleteThanks so much! If you look again, you can see how I selected different areas of my hair and pasted them all together into one picture, so I could enlarge my hair. I selected the pieces from various pictures of me in different postures from the photoshoot. After pasting, I used the clone & healing brush to pull them all together. The hair itself in the final portrait is actually from several pictures.
Delete